Friday, April 30, 2010

Cob Building | Gringo Blocks


So building with cob is a full on workout!  It would make a great exercise video;  a half hour of dancing in the mud, followed by a half hour of picking up 5-20 pound chunks and literally massaging it into the wall… repeat.   However, do not expect to see me leading the class in my Spandex!

Cobbers Thumbs
The idea is to “stitch” the new layer to the one underneath.  Real thumbs work, but do have limitations, hence the carved pieces of wood.  The concept is to drive pieces of straw in the top layer down into the layer beneath it, thereby increasing the monolithic strength of the wall and helping to bind the whole thing together.    


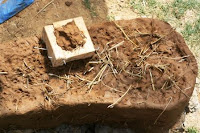
Gringo Block
Lets say you wanted to add a door frame, or something of the sort to the wall of cob.  How do you do it?  The solution I’m experimenting with first is the Gringo Block.  The detailed drawing is from The Cobber’s Companion, and explains it much better than I can.  The premise is to build a small block, bury it within the wall, with one side of the block flush with the surface.  Installed correctly, with the nails driven in from the sides of the exterior piece of wood,  one can screw or nail in other pieces of wood securely.  So I am installing 2 – 3 Gringo Blocks in case I would want to put on a door.  (Certainly not for security since the lumber shelf is wide open!)  The door would really be just for aesthetics from the outside and to experiment with the concept.  The part I really like is that if I bend a nail…. no big deal!  Just pound in another and leave the bent nails in place which help secure the block even better once buried in the wall.

There are other options for mounting things to the cob wall.  A large forked section of limb with the butt end flush with the surface,  a block of wood with lots of bent nails, a few pieces of old wood nailed together in a “T” shape are all possible alternatives to achieve the same objective


Some foreseeable challenges
I’m noticing some cracks in the wall as it is drying.  This is something I will have to watch.  This doesn’t quite match with my test bricks, as to my understanding cracks form when the mix is heavy on clay.  I have no idea what I’ll do if the cracks become a problem!  Stay tuned for the crack drama.    

My pile of dirt set aside from the trenching and leveling of the site is dwindling rapidly it seems.  So I have begun to consider where I’ll put the pond in my front yard! 

 Ticker
Money spent so far: $92
Time spent so far: 38 hours

Sunday, April 25, 2010

Let the cob slingin' begin

It is finally time to dance with mud!

I decided to find a recipe so that each batch of cob is the same consistency. I am using the tarp technique described in the books. The suggested ratio is about 4:1 dirt to water. So I tried 6 bucketfuls of dirt with about 1 and a half buckets of water.

Mixing the first batch
So for the first batch I piled up the dirt, stomped on all the clods with my shoes and splashed on the water… which almost ran right off the tarp! TIP: I quickly discovered with future batches that its best to spread the dirt out; it makes it easier to smash up the hard clods and allows the dirt to hold the initial bucket of water.

It is referred to as dancing with mud because the best way to mix up the ingredients to literally “dance” on it. It’s critical that the clay and sand get mixed together well and the cob form what basically is a dough ball. With the tarp method you stomp all over it, then grab a corner or two of the tarp, roll the stomped out mud towards you, then dance again…. And again… flip the dough…. Dance some more. Well you get the idea. I found that for the first few dances it’s best to actually hold the corners of the tarp rolling the dry stuff into a heap, then after the initial water is soaked up, spread it out and stomp it flat, before rolling it. TIP: make sure some of the rolls flip the entire pile over to insure the very center gets mixed up!


Adding the straw
After dancing and flipping several times, I added the additional half bucket of water and continued the process. This batch amount is about perfect for one person, much more and it would have been quite difficult to flip. After a while the flipping motion rolls the dough into a burrito shape… you're aiming for a long ellipsoid shape.  (Watch the web preview). What I am looking for is for the material to become one solid elliptoid. If after I roll it the burrito is cracking and splitting a lot as in picture 1, then I need to keep mixing. Eventually when I roll the edges of the roll with flow into that elliptoidal shape without cracking. (Picture 2 is my first experience with this) At that point its time to add some straw. Shake a little straw on and dance away! The longer stands of straw apparently are the best for adding strength to the finished mixture. The process of mixing in the straw is more difficult. With just the mud I found that a “heel spin” or “toe run” worked nicely. Once the straw was added into the mix it became significantly more solid and more difficult to squish flat. I found that forming a burrito, sprinkling some straw and then doing a ballet style “toe dig” really helped mix the straw into the mix. Eventually it felt about right (picture 3) and I began adding the first layer of cob to the wall.

Putting the cob on the wall
Pulling flakes of cob out of the turd was more difficult then I expected. I formed large patty like shapes and began adding them on top of the foundation, trying to really squish it in all the nooks and crannies. Picture 4 shows the results of my efforts for the very first batch. Total time from shoveling the buckets of dirt to having no more cob to put on the wall? About an hour. Picture 5 shows two batches of work.  I have been adding layers and am quickly, learning by experience the best way do things. Stay tuned!


Ticker
Money spent so far: $92
Time spent so far: 29

Friday, April 23, 2010

Cob building foundation


It is time to start the foundation for my cob building.  The foundation is a critical part, besides keeping moisture from wicking up into the cob, it also is the stable platform upon which the weight of the cob will rest.  Wet dirt is very heavy!

With my two part design, I am afforded a bit of a luxury in that I can now complete the East wall completely before digging the trench and starting the foundation for the “U” shape wall. 

Laying out the first level of the cob foundation
After laying a bunch of pieces of “Urbanite” out on the ground, I began building the puzzle.  (See previous post for more on my "Urbanite" adventure.  The idea is to have each layer of rock solid before adding more.  Each successive rock should contact two or three rocks below it.  Additionally the width of the foundation should be slightly bigger than the width of the cob wall at its base, which is supposed to be slightly larger than the cab wall at the top.  I am aiming for a cob base of between 12 – 16 inches.  So I cut a piece of PVC pipe to 18 inches to use as a jig as I build the foundation…. A guideline if you will, for knowing about how wide I want it to be.  I also decided to use some “selective mortaring” using some reinforcement in the trickiest places, particularly along the edges.

Finishing the foundation
Once I placed the biggest stones for the first level I filled in the gaps with small stones and a bit of mortar in a few places.  Then I continued level by level.  TIP:  have a bucketful of “chinkers close by”, small stones of various sizes to use as wedges and supports to get the larger rocks even and steady.  The idea is that you should be able to walk across a level without any rocks moving.  I found an old piece of bent metal I stuck in a hole a rock to be hidden within the cob wall.  I got the foundation solid and about a foot above ground level and decided that was enough.

Temporary roof
I also installed the roof rafters on top of the main support beams and covered it in plastic.  My hope is that the temporary roof will keep the area dryer and possibly allow me to work in the rain. One of our outdoor cats shocked me by walking out onto the plastic!!!. For more pictures and the full story of this episode visit my nature blog.

Ticker

Mortar, lumber and joist supports for this stage $36
Total money spent so far $92
Total time spent so far: 25 hours


 Now it’s time for some mud-slingin!

Thursday, April 22, 2010

The cob shed roof supports


I have decided to get the roof supports in place before starting on the foundation wall.  Cob is freakishly strong considering its ingredients, and the cob walls will bear the entire load of the roof.  Provided it has opoortunities to dry out (IE is not in standing water) a finished cob building has an amazing ability to absorb a lot of water and still maintain its structural integrity.  However the more exposed to the elements the more rapid the erosion... it is just dirt after all, so a good roof is critical to the structure's longevity. 
 
When to build the roof on a cob building
There are two options:

1. Build the cob walls first, installing the roof support beams as you get towards the top
2. Build the roof structure first, on temporary posts that will be removed later

It certainly seems easier to build the cob up to the roof supports, knowing exactly where that is already, versus guessing at it and trying to get the roof to match the walls.  Additionally the idea is to “sew” the cob together as you build the walls, so it needs to be moist in order to get added layers sewn together.  If the cob drys out to much it becomes more difficult to keep it a monolithic structure, if it gets to wet the wall lacks enough strength to support the wall being added above and begins to mushroom out.  So I thought if I build a roof support I can cover the area making it easier to maintain better conditions.

Procuring the roofing timber
My next door neighbor had some old lumber lying around outside and was willing to let me take what I needed.  As an interesting side note, as i was scrounging for timber I discovered a Killdeer nest nearby:  read about it here: The amazing birds nest on the stones

Several hikes up and down the hill with lumber over my shoulder and I was ready to proceed to building the roof structure. 

Creating the roof support structure 
Once again, my original design concept turned out to be rubbish.  I had envisioned a shed style roof sloping from the deck down towards the driveway.  Once I had the beam on the East side kinda up in place, I realized my cob wall was going to have be about 10 feet tall to support it!  A bit more then I bargained for.  Then I realized if I harmonized with the lay of the land, the slope of the roof would be just about right and the water would be more likely to run away from the walls anyway.  (Moot point really, as I plan to put in a rain barrel, but until that happens it is a comforting thought).  Another comforting thought is that by “recycling” the deck by making it part of the project (albeit temporarily), I am saving on wood!

Now you might ask who helped me put this up?  Well it was just me, myself, and my friend “intuition”.  Plus I’ve learned a few things from Chuck who has managed some amazing projects by himself.  I did discover a clever tip any competent builder probably could have told me….  When building the helper supports on the temporary posts, by putting one nail in each piece, you can swivel the “feet into just the right position to get some bite and hold the post in place.  Trying to figure it out ahead of time and putting in two nails for support was certainly a ridiculous thing to watch me do from a distance. 

Once I had the long south support beam in place the natural lay of the land under the posts created a perfect slope with out having to make any adjustments.  Then it was just a matter of leveling the cross beams and, using some of my rope skills, lashing them to the deck.  Now I will probably put the remaining plastic left over from my under deck wood nook creation, to good use as a temporary roof until I actually figure out what to use for the permanent roof!

NOTE:  the three vertical posts will be removed at the end with the cob walls bearing the load of the roof.  Aren’t convinced?check this out:  Just one example of cobs ability to support weight.... just cob supporting the roof beams, the roof, and all the people!

Ticker
Money spent so far: $56
Time spent so far: 18 hours

Wednesday, April 21, 2010

Site Prep for the Cob Building


So I have settled on the placement on my cob shed.  I am putting up against the deck on the south side of my house, with easy access to the mower and other stuff I plan to store inside.  I laid out my ideas with sticks and rocks, just to get a feel for the actual size and shape of my design ideas. 

The Cob Building Plan
I am planning to use this shed to store lumber as well.  I had this beautiful plan at first, then realized I was going to have to carry lumber through the door, and then try and spin it around to put it away!  That would have made a fun story at the very end…. sorry to disappoint you though, I figured it out before spending all this time and energy on the cob building.  I also realized that after building the 12-16 inch thick walls the interior space was going to be tight for storing wood.  So then it hit me like 16 tons of “Urbanite”….  Why not use the low space under the deck for storing wood?  So my original  plan (well the dumb spin the lumber plan was my original, but I’ve tossed it out and am now calling this one my original plan) calls for kinda a split level shed, with low walls built under the deck for storing lumber and other such long pieces of material.  The door is directly across from the lumber shelf, allowing me to be able to take lumber and pipe directly in and out without and spinsies. 

Digging, Leveling, Stapling, and Stapling Again
So now to begin digging the foundation trenches and leveling the area.  I have a shovel.  Luckily I also have a few friends and one of them named Chuck agreed to loan me a few other hand tools.  So now I also have a sledgehammer, a mattock, a trenching spade, and a spud bar.  Perfect tools for the job!   

However I soon ran into a problem.  Digging foundation trenches under the deck was going to require either a much shorter shovel, or a much higher deck… neither of which were at my disposal.  So a plan adjustment was in order.  Why does there need to be walls under there at all?  If there was a way to keep water coming through the cracks in the deck from getting into the area, perhaps I don’t need to build any wall under there at all.  I surmised that a large sheet of wood hanging from the joists under the deck, tilted slightly down and out might do the trick.  Then I surmised that a much cheaper alternative, at least for the short term was a large sheet of plastic.

So for $6 I bought a 10” x 25” roll of plastic and began stapling it to the underside of the deck.  I put about 30 staples all along the short edge and stepped out to take a look if it was actually going to work.  A gust of wind caught the giant sheet of plastic, billowed it like a sail and promptly ripped it completely from the deck. 

I eventually worked it out, tested it, and so far it seems to be working.  The plus is my newly planted Clematis will get plenty of water!  I do need to add some wood blocks at the critical points to hold the plastic in place there, but for now I can store wood there safely. Plus my daughter Shyla loves to crawl under there and bat at the water on the inside of the plastic, giggling as it dances and bounces about:  win/win.


Next Steps
All of the dirt from the foundation trenches and leveling will be used to actually make the cob.  Shyla on the dirt pile at about the half way point in this process, so by the time I was finished it was a pretty decent sized pile.  So after about 8 hours of digging I’ve managed to carve out enough to move on to the next step, building the foundation.

I am also considering trying to figure out the roofing concept first.  We’ll see.So here is a solid look at the actual layout of the Cob Shed.  The ends of the West wall in particular are have "knobs" on the end.  I've read that cob is stronger when is has some curve to it rather than long straight sides.  I figured adding a bit of bulk at the ends here might increase that stand alone walls strength, particularly since it will likely support a roof beam. 


Ticker
Money invested so far:  $56
Time invested so far: 14 hours

Monday, April 19, 2010

Procuring cob foundation material - Urbanite


Rule # 1 - Don't screw up  (at least not this early in the project)
I realized the first step in building my cob building is preparing the site and laying the foundation.  I figured before I start digging anything I better be sure my shovel doesn’t black out the neighborhood or something!  So I called  811.   Know what's below, before you dig

Eight comes before 9, so 811 is what you call first, so you don’t have to call 911!   Calling it will get all the proper utility companies out to the site to mark underground utilities.  TIP:  In Ohio you can do it right online.

Procurement, bureaucracy, and cheap Urbanite 
Next step was to procure some material for the foundation.  If not protected properly, cob is prone to rapid erosion.  So cobbers call it “giving it proper boots and a hat”.  The foundation is the boots.  (The roof is the hat.)  I priced out stone and gravel and decided to try and scrounge something more economical.  So for several days, as I drove around I looked for piles of rubble.  I read that “Urbanite” makes good foundation material.  I have been noticing giant piles of bricks and rubble at the county road maintenance facility.  So I stopped in to inquire about getting some of it.  Funny thing, not even the road guys are allowed to move or take any thing from these piles (that have been there for at least 3 years).  The piles are the remains of the demolition of the old buildings that used to sit on the site, to make way for the new and improved maintenance buildings.  I’m guessing because it’s part of the government bureaucracy, until EPA has done something to confirm the rubble is free from … something, or safe for something, no one, not even the government is allowed to touch it. ironic isn’t it?
  
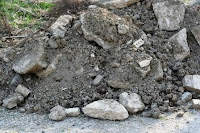
I finally noticed piles of “Urbanite” not far from my house.  After some inquires I found the owner.  He was quite happy to get rid of some of the stuff and charged my only the delivery fee.  So for $50 I got 16 tons of the stuff dumped in my driveway. 
 
What's in there
There is definitely some very big, unwieldy, and sort of unmovable pieces.  I'm told if I'm a bit lucky, with the brute strength Hercules, and an unbreakable sledge hammer.... i might be able to break them into more manageable pieces.  However I did manage to pick out some decent usable pieces in about an hour.  The pile hardly took a dent so  I am hoping there is plenty more buried beneath the dirt.  By the way, if you have kids, you should get a pile of dirt, my daughter has played more outside since getting the stuff then she ever did before.  (Robert Louv is a big advocate for piles of dirt in his book Last Child in the Woods.)


So now that I have a giant pile of “Urbanite” rubble in my driveway, I can’t very well turn away from this project now… so on to preparing the site!


Ticker
Hours invested: 5
Money Invested: $50

Tuesday, April 13, 2010

Cob Testing


I decided to follow some advice out there from my cob building, and test the soil around my house to see how it stacks up to the preferred mix of ingredients.  The ingredients for cob are quite simple; sand, clay, water and straw.  I’m reading that the best mixture has between 30-50% clay.  The sand gives it form, the straw gives it tensile strength, the clay sticks it all together, and the water allows it all to mix up and be formed as you wish.  I found some great advice on testing the mix in chapter 3 of  The Cobbers Companion.

I dug some mud from the small creek behind my house and some dirt from a hillside on north side of my house.  .I was curious how the soils were different.  I tried the soil separation test but couldn’t quite figure out the results. 

Soil Separation Test: Putting the dirt in a jar of water, shaking like crazy and waiting for it settle out.  The Sand, silt, and clay are supposed to form obvious layers. 

I figured maybe real live testing was a better bet.  So I made test bricks with the two different type soils I collected, plus one mixed with both types of soil.  Additionally I was curious if any dried material similar to straw would work.  I had a good collection of last years brush that I thought might work like straw.  Apparently Hay or other very organic material isn’t a good choice as it rots away within the wall leaving weak spots.  This stuff seemed very dry and inorganic in quality, much like straw.


Results
I let the bricks dry for a few days and then decided to see how they performed.  The bricks made of river mud cracked when I applied pressure with my hands, and literally crumbled.  When I dropped one from 6 feet onto concrete it exploded.  I concluded they had to much sand.

The bricks from the north side of my house developed large cracks in them as they dried.  This is an indication of to much clay.  However I couldn’t break them with my hands, no matter how hard I tried, and they only broke off a chuck with the drop test.  The mixed soil brick performed only slightly better than the ones dirctly from the river, possibly it would work if i adjusted the mix. 

The actual straw performed slightly better than the material I had gathered at my house.  If I was building a home to live in I would definitely use straw, but since this will be a shed to store a Lawn mowerlumber etc., I figured saving the $20 on straw was worth using the material I had on hand.  We’ll see.

Location, Location, Location
All of this testing was done prior to actually deciding exactly on the site.  Once I determined where I wanted the shed I made some more test bricks from the soil right there.  To my extreme joy they performed better than either of my previous bricks!  They did not crumble, nor did they crack.  The soil directly at the site seems to have a good blend of sand and clay.  This is good because it means and soil I excavate for the foundation will get reused in the cob itself, saving me time and effort!               

Ticker
Hours invested so far: 3
Money Invested so far:$0

Wednesday, April 7, 2010

Building With Cob


Why Build With Cob
Why build with cob?  Why not?  Perhaps the most compelling reason for me is that it doesn’t require any specialized tools or skill!  There is no industrialization involved, no manufactured parts, no need for perfection, and if built correctly can withstand the elements and the test of time.  It’s really more of an art form.  It involves curves and organic shapes; which are being proven to be more beneficial to the human spirit than straight walls and corners.  The fact that your finished piece or art is a building is just gravy.  Top that off with the fact that you literally get to work with the earth, recycle stuff, and spend less money than you would on conventional building methods… well, that seems right up my alley! 

My cob Building Journey Starts Here
Yes I am embarking on a journey to build with cob.  I’ve decided to start small, with a shed.  Though there is plenty of evidence to suggest that a full size house of great form and function is possible, I figure in order to taste success and gain some experience, perhaps I should start small.  I am quickly finding that this was the right choice for me, as there is quite a lot to consider when building with cob.  I think the simplest, easiest to read basic guide is:  The Cob Builders Handbook: Hand-Sculpt Your Own Home

The Design
Like all building, before anything happens, you must have a plan.  A poor plan and everything else becomes exponentially harder.  Cob building rely on curves and a simplicity of form blended with function, not straight walls and corners.  Chapters 6 and 7 of  The Hand-Sculpted House: A Practical and Philosophical Guide  are phenomenal resource for design planning.
 
Here is where I am planning to build my shed.  (Provided there are no buried utilities.) It is roughly a 9’ x ’14 foot area up against the deck.  My original plans are calling for a rocket stove built into the south wall.  My wife and I like to sit outside at nights and during the winter I though it might be nice to have a little “bun warmer” built right in. I’m keeping the design pretty simple except for the stove and bench.  I figure it will be good practice if I ever decide to build on a grander scale.


The Ingredients
The ingredients for cob are quite simple; sand, clay, water and straw.  I’m reading that the best mixture has between 30-50% clay.  The sand gives it form, the straw gives it tensile strength, the clay sticks it all together, and the water allows it all to mix up and be formed as you wish.  My original plan was on less suitable ground I think, so I am making a few test bricks to see how the soil in my yard compares.  I am hoping to find a decent mix that doesn’t require me to go find ingredients elsewhere. 

Cob is the brother of Adobe.  Adobe is the same ingredients formed in to bricks that are then used to build structures.  Cob is monolithic, in that the ingredients are literally “piled on”, forming one solid mass of structure.  The most interesting part is, that even with its simplicity, buildings made of cob outlasts building made with many other materials.  There are cob building in England and elsewhere that have been constantly inhabited for nearly 1000 years.     
 
Other Considerations
If not protected properly, cob is prone to rapid erosion.  So cobbers call it “giving it proper boots and a hat”.  The foundation is the boots, and the roof is the hat.  Without a solid foundation and a well designed roof, all of the building efforts won’t be worth…. Well, the effort.  Then there is the issue of electricity and plumbing, which, I’ve managed to forestall for now by building a simple shed.   

Stay tuned and Follow my Experience
I will share my experiences with you.  There will certainly be much to laugh about, and probably some to cry about.  Perhaps it might encourage some of you to give cobbing a go in the future.