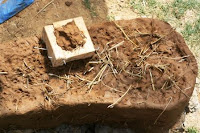
So building with cob is a full on workout! It would make a great exercise video ; a half hour of dancing in the mud, followed by a half hour of picking up 5-20 pound chunks and literally massaging it into the wall… repeat. However, do not expect to see me leading the class in my Spandex
 !
!
Cobbers Thumbs
The idea is to “stitch” the new layer to the one underneath. Real thumbs work, but do have limitations, hence the carved pieces of wood. The concept is to drive pieces of straw in the top layer down into the layer beneath it, thereby increasing the monolithic strength of the wall and helping to bind the whole thing together.
Gringo Block
Lets say you wanted to add a door frame, or something of the sort to the wall of cob. How do you do it? The solution I’m experimenting with first is the Gringo Block. The detailed drawing is from The Cobber’s Companion , and explains it much better than I can. The premise is to build a small block, bury it within the wall, with one side of the block flush with the surface. Installed correctly, with the nails driven in from the sides of the exterior piece of wood, one can screw or nail in other pieces of wood securely. So I am installing 2 – 3 Gringo Blocks in case I would want to put on a door. (Certainly not for security since the lumber shelf is wide open!) The door would really be just for aesthetics from the outside and to experiment with the concept. The part I really like is that if I bend a nail…. no big deal! Just pound in another and leave the bent nails in place which help secure the block even better once buried in the wall.
There are other options for mounting things to the cob wall. A large forked section of limb with the butt end flush with the surface, a block of wood with lots of bent nails, a few pieces of old wood nailed together in a “T” shape are all possible alternatives to achieve the same objective.
Some foreseeable challenges
I’m noticing some cracks in the wall as it is drying. This is something I will have to watch. This doesn’t quite match with my test bricks, as to my understanding cracks form when the mix is heavy on clay. I have no idea what I’ll do if the cracks become a problem! Stay tuned for the crack drama.
My pile of dirt set aside from the trenching and leveling of the site is dwindling rapidly it seems. So I have begun to consider where I’ll put the pond  in my front yard!
Ticker
Money spent so far: $92
Time spent so far: 38 hours
Money spent so far: $92
Time spent so far: 38 hours


No comments:
Post a Comment